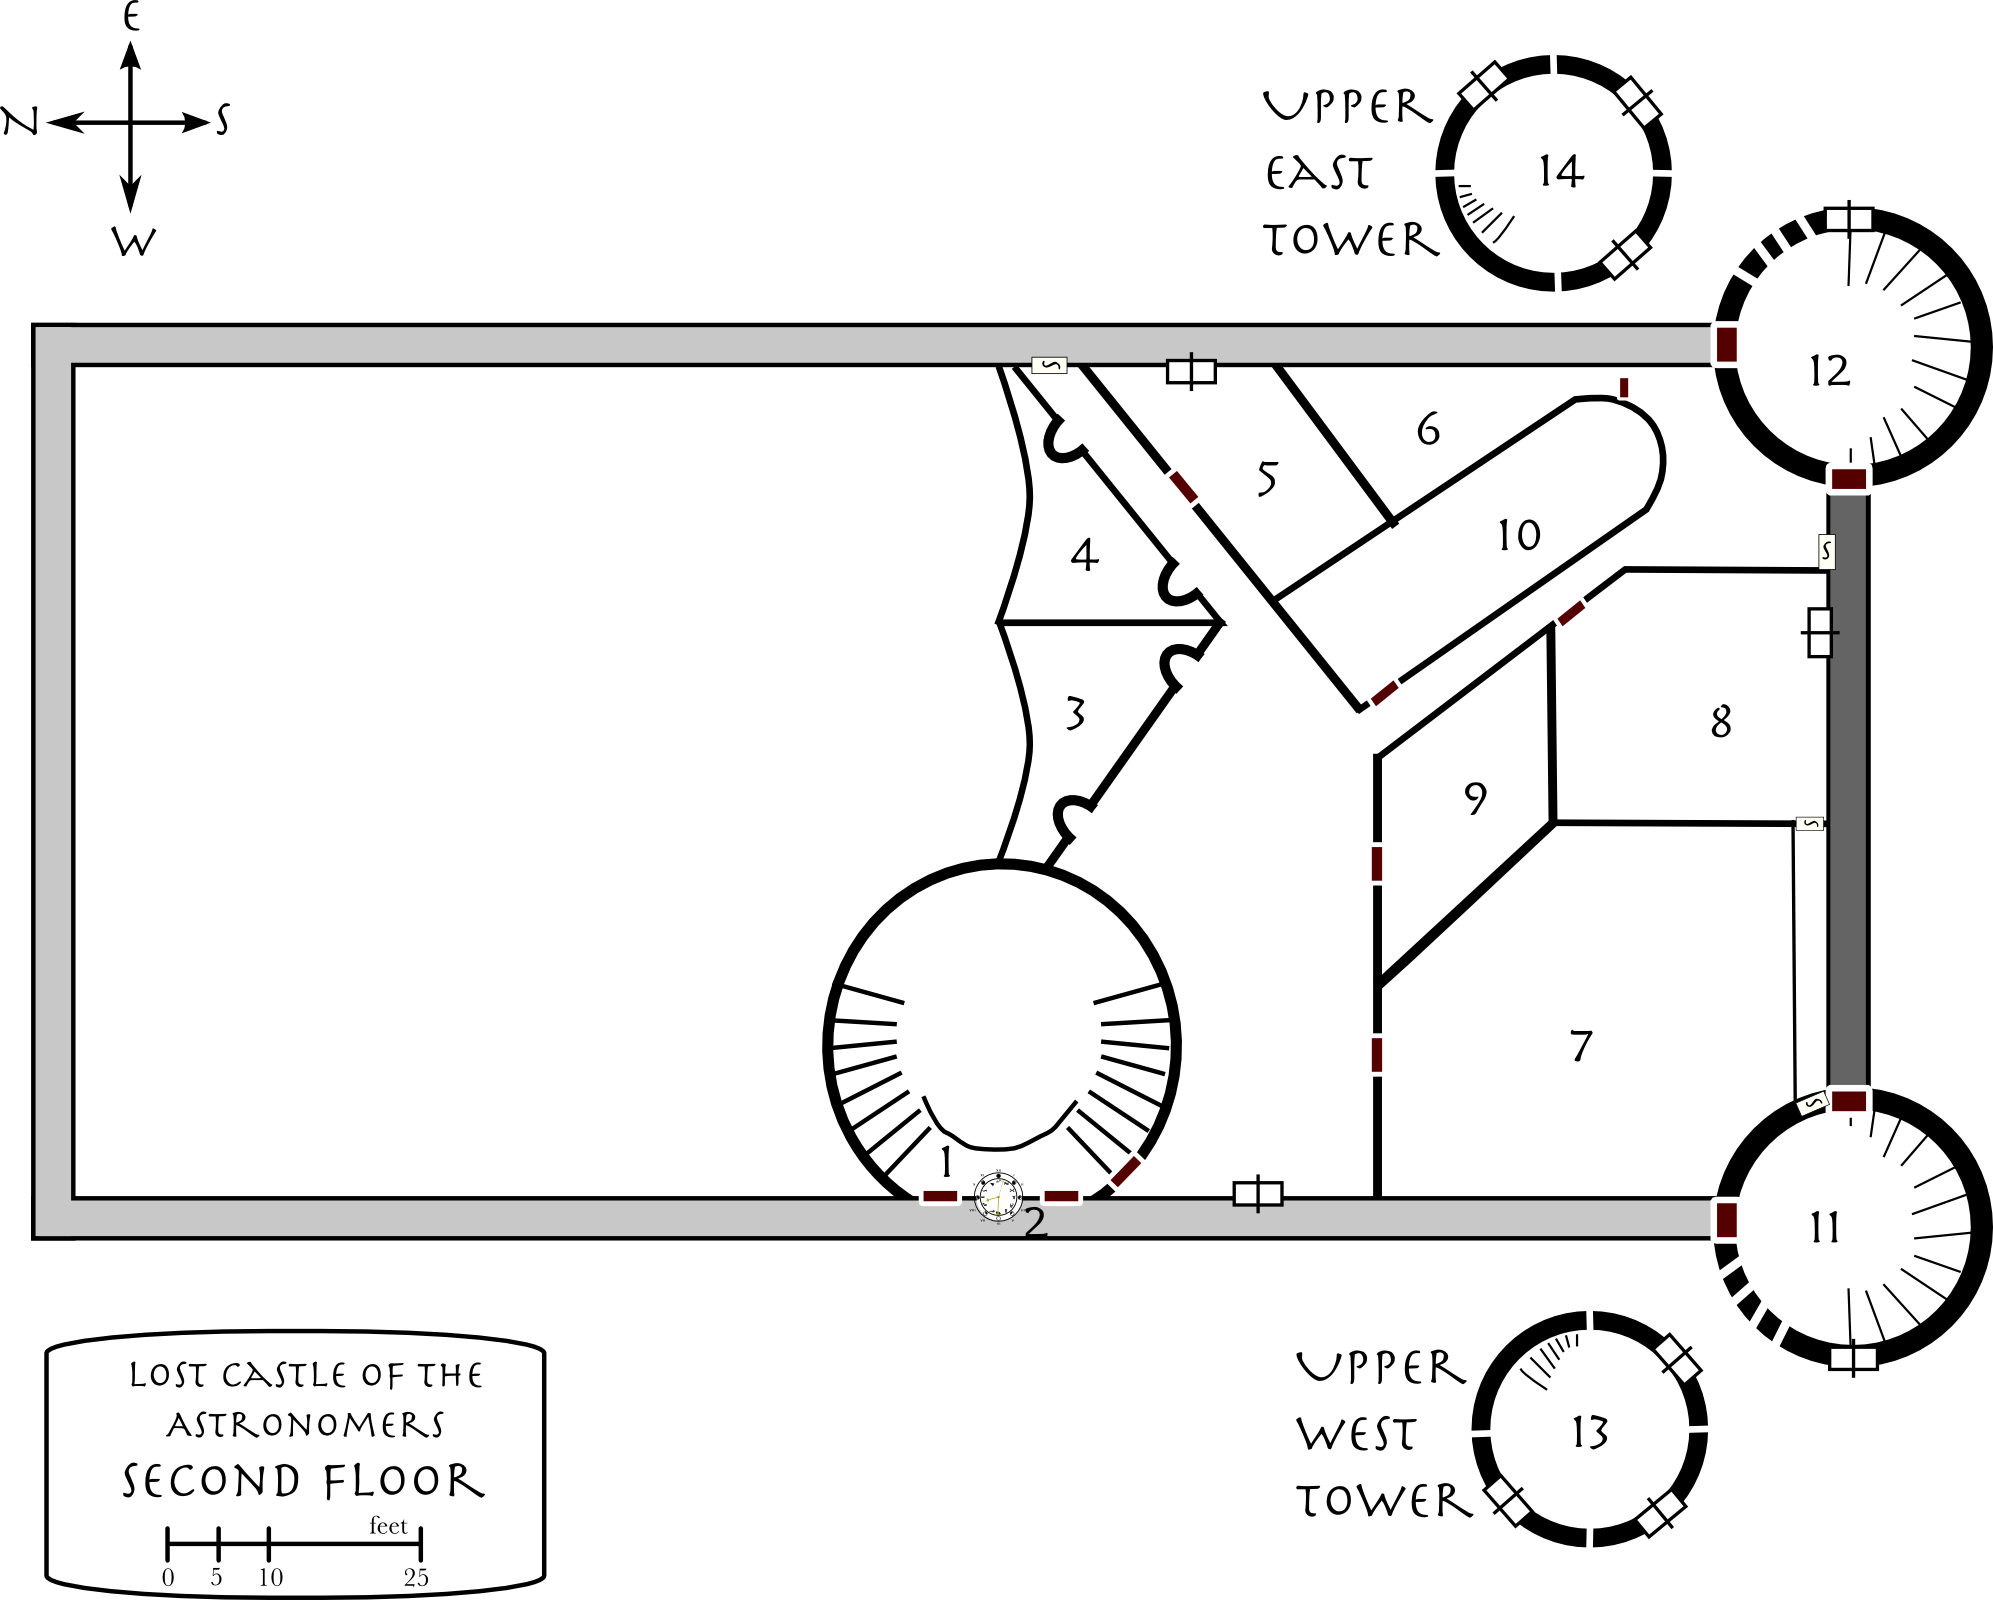
Upstairs (The Second Floor): Encounters
The chance for an encounter within the upstairs area of the castle is 10% every six hours, although if the skeletons have been activated it is unlikely that other creatures will come out of hiding.
| 01-38 | Normal Spiders (1d3) | 38% |
| 39-65 | Large Spiders (1d2) | 27% |
| 66-78 | Lost Bird (1) | 13% |
| 79-88 | Mice (1d20) | 10% |
| 89-95 | Strange Noises | 7% |
| 96-98 | Borogoves (4) | 3% |
| 99 | Pink Horror (level 1 room 8) | 1% |
| 00 | Loose floor | 1% |
In the event of a loose floor, the affected player must make a Perception or Evasion roll to avoid falling 15 feet to the first floor.
For information about the borogoves, see the key for the East Overlook (room 3).
The secret doors at the end of the hallways between rooms 4 and 5 and between rooms 8 and 12 are not very secret, (and were often opened by the original inhabitants). Search at +5 to find them.
Upstairs (The Second Floor): Battlement
From here you can just see across the outer walls and survey the forest for miles. Beyond the desolate courtyard, the trees are thick, some green, some the red and brown of autumn. Far to the southwest a mist rises above the trees. Occasionally you hear the cries of birds and the screams of predators.
Skeletons of the castle’s defenders lie scattered about the battlement. A few of the skeletons are goblins.
The crenellated battlement runs above the first floor and at the same level as the second floor, along the entire edge of the castle. On the north half, the dome of the ballroom rises above the battlement. On the south half, the walls of the second floor rise another twelve feet. The battlement does not extend through the towers: the two towers have doors which open outward.
The tower doors are open. The southwest tower doors are charred at the edges. See the Charred Door, below, for flavor text.
There are human skeletons scattered throughout the battlement, and three goblin skeletons lying on the north side.
There are three windows set five feet above the battlement, and two doors that lead into the main entrance on the first floor. The windows have wooden shutters, once used to close them in inclement weather, that lie on the battlement.
Charred Door
The door to the tower is charred and blackened around the edges, as is the wooden frame set into the stone tower walls. The door itself is slightly opened, and shudders lightly in the breeze that blows across the battlement.
The tower room on this floor was hit with a fire spell that killed everyone in the second floor tower and started a fire that burnt everything inside.
Landing (1)
At the top of the stairs, you look over the grand entrance and the curved walls and ceiling. The knotwork is almost hypnotizing, and leads into the ceiling’s constellations so well you can hardly tell where one ends and the other begins. You hear a barely perceptible whirring coming from beyond the wall, interspersed with a slight ticking. Two doors lead west, and one leads south.
The two western doors lead out to the battlement. The southwest door leads to the second floor.
Upstairs (The Second Floor): Clock (2)
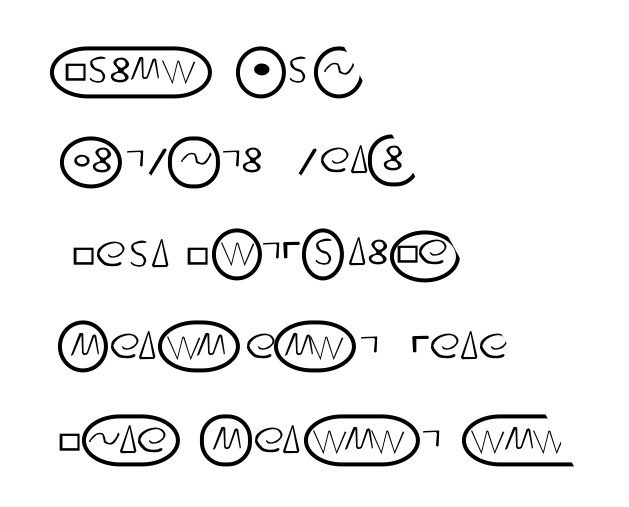
The great marble arch encloses a golden circle. Inside the circle, three hands point at arcane symbols. Some symbols look like ancient reckoning, as are often found on clocks. Others might be moon phases, and others are even stranger.
The “even stranger” symbols are the zodiac (see handout). The face can be pulled outward (although it is about seven feet up) to reveal gears inside. This clock was designed for the long haul. It does not rust; it does not collect dust; dust it does collect is blown off by fans; animals are discouraged with moving blunt pinwheels. The gears gleam as if they were polished yesterday.
It runs by water from below. Water winds the clock, and a long axle reaches up through the castle walls to turn the hands.
East Overlook (3)
Beyond the arched doorway, tapestries hang in tatters from the walls, and lie in heaps on the floors. Tables are tipped over and ceramic jugs and pots lie shattered on the floor. Couches are ripped open. Seeds are scattered about the floor and crannies. A pile of straw lies in the far corner. A wide arched balcony overlooks the great ballroom. Shafts of light break through holes in the ceiling, illuminating the devastation below, the skeletons and columns.
There is no door, just the archway. The pile of straw is a borogove nest. If not yet dead, they are here 50% of the time. They are unlikely to attack, although they are shy and will leave if they hear noise, inflating their tails and floating out over the ballroom and out the back door.
The nest includes bits of gold, silver, and colored thread, three silver zodiac coins, a brass key, and a silk glove. The key is the key to the Gemini room in the dungeon level.
Borogoves (Fantastic: 1-1; Survival 3, 4, 3, 5; Move: 8/4; Defense: 2; Attack: claw/claw/bite; Damage: 1/1/1; Lair: 50%)
West Overlook (4)
Beyond an arched doorway, tapestries lie in ribbons and tatters on the floor. Tables are tipped over; ceramic jugs and pots lie scattered about, and a couch has been turned over and torn apart. A wide arched balcony overlooks the ballroom, where shafts of dusty light illuminate the dead below.
If the borogoves are in room 3, any noise here will likely scare them into leaving; they will then be visible from the balcony.
Bedrooms (5)
A gaping hole in the ceiling has given the elements full reign. A flock of birds flutter out the hole as you open the door. Cots are overturned. Boxes, pots, and chests are smashed. All are covered in bird droppings and feathers.
The room was first ransacked, then left to the elements, and finally turned into nests. Searching the room could, on a successful Perception roll, find d3 silver zodiac coins, up to seventeen total.
Toy Room (6)
The ceiling has partially collapsed. Birds flutter away as you open the door. Beneath the feathers, dust, and bird droppings, odd structures poke above the rubble.
The odd structures include smashed starfields painted on wood, including a starfield painted on wood with a shield attached, with a hole in one side; the shield rotates to show only part of the starfield at a time. The edges are marked with astrological symbols (to denote the months). What were once glass spheres within spheres to show planets and stars are now in slivers.
There were also tools for metalworking, woodworking, and measuring, all destroyed or rusted away. Calipers stick out of one bird’s nest. Hammers, wood shaving knives, pliers, all worthless, may be found. Whether or not anything is salvageable is up to you. Anything that is salvageable will take significant work to restore.
Carrels (7)
Tables and chairs lie overturned about the room. Ragged paper fragments flutter slightly as you push the door further open. The walls are stained a faded blue. Light glows from circular skylights in the ceiling.
The faded blue is from ink, long faded, that the goblins tossed against the walls. The tables were carrels, basically, for studying. Each scholar or pair of scholars would work at a table and store their work there.
Among the papers here are plans for an “astrological laboratory” (an observatory). Only parts of the plans remain, and they were never finished, but a scholar could with years of study recreate the missing work.
There are four skylights. Two have translucent glass covering them; the other two are open, shattered glass lying below them.
Abbot Jethroh Parthane’s Bedroom (8)
Your eyes are drawn immediately to the life-size portrait on the far wall. A man in nearly royal accoutrement stands amidst the stars and moon in a black velvet sky. A tall bed to your right bears a sagging, torn canopy. Beneath the bed appear to be drawers. A bookshelf and writing table stand to your left. A high window overlooks the battlement.
The painting was very important to the last Abbot. It has been enchanted with a permanent indestructibility: +5 to saving rolls. It has barely aged because of this. On the abbot’s left is the constellation Libra. On his right is Leo.
The Abbot’s diary is largely intact. Written in both Ancient and Anglish, depending on what the Abbot felt like, it concerns itself mostly with the bureaucratic aspects of running an order. The last entry, for example, concerns a dispute between Captain Cambel and Lieutenant Courlander. Another recent entry indicates that the harvest was extremely good this year. The diary also contains, about a year previous, the code word for “Abiram’s book case”. (See room 9.)
There is no money here. His clothing (much of which contains the symbol for Leo) is intact enough to be worth 60 shillings and his portrait is worth 80 to 120 shillings depending on tastes. It may be removed from its frame and rolled up to reduce its bulk from 35 to 10. The portrait is by turn-of-the-century South Bend painter Henry l’Autrec, and dates to 1885, the beginning of that painter’s career.
 Behind the painting is a secret door to the southwest tower. If the painting is moved, the door is relatively obvious; rolls to find it are at +5. It opens simply by pushing on it, and then it swings back into place. It does not open from the other side.
Master Astronomer Abiram Forney’s Bedroom (9)
The wooden door, closed, is scratched with a circle, with a multitude of crude lines pointing out of the bottom.
A goblin skeleton lies clutching a book on the floor in front of a small, glass-enclosed bookshelf. The glass doors are open, and on the shelf are books and two vases or containers of some kind.
A large decorated pot in the corner of the room is overturned, and drawers beneath a simple mattress have been opened, their contents strewn about the floor.
The door was scratched with a warning to the other goblins looting the castle, to stay away from this room, after one of them tried to take a book from the shelf and was killed by the lightning ward. They fled, leaving the corpse and the room, slamming the door behind them. The symbol represents the sun, a warning symbol to goblins. The goblin skeleton is holding Abiram’s diary.
The ceramic chamber pot is decorated with symbolism relating to the two zodiac signs Leo and Virgo. It is worth 5 pounds.
The Master Astronomer was also the Master Engineer. It was Abiram’s predecessor who decided that they didn’t know enough about building castles and that they should work with the Dwarves on any further additions (such as the dungeon level). Abiram worked with the Dwarves to design the clock tower. He has all of his notes on the clock’s mechanism and construction in a binder; his diary (in the goblin’s “hands”) also contains much related to the clock’s day-to-day construction, as well as his consultations with the Dwarves. Combined, the two books would be worth 200 to 300 shillings, depending on the buyer. The diary alone is worth about 50 shillings; the plans about 100 shillings. The binder is in the bookshelf.
Abiram specialized in protective spells. His bookshelf is protected by a minor ward that has been made permanent. The first person taking anything from the shelf without speaking the phrase “ne lucere”, pronounced approximately “nay loo cherry”, will take 2d6 points lightning damage. They may make an Evasion roll for half damage. The ward replenishes each night at midnight. Only the Abbott (and Abiram) knew the pass phrase.
Also on the shelf (and also subject to the ward) is a small vase decorated with wolves howling beneath a starry sky. In the vase is the Pisces treasure safe key, a small brass key. A cobalt-blue vial contains a healing potion imbued with a fourth-level healing spirit (normally it will heal 1d8 survival points, for a minimum of 4 points). The vial is marked with depressions in the shape of the stars of the constellation Aquarius.
Finally, there is a second book still on the bookshelf. It is a notebook detailing star positions and how to build some large structure; it is how to build an observatory. It matches the observatory in Stelopolis.
Much of Abiram’s clothing contains the symbol for Virgo.
Temple (10)
The doors to this wide, empty room are already mostly open. Muted light shines from two white skylights in the ceiling. Dark wooden bars cross the floor all the way up to the front of the room, where a wooden altar stands before a huge tapestry. The tapestry appears to be a depiction of Heaven, but in this heaven the departed read books in great, heavenly libraries, and write on papers that are then handed to angels who shelve them in golden scroll repositories, while Jesus and the Saints perform alchemical experiments, and God the Father crafts the stars in firm and gentle hands.
The temple has been ransacked. The low bars are solid oak kneelers (there are no pews). There is also an oak podium, overturned, on the west side of the altar. There are a few prayer tracts scattered about, with prayers dedicated to “the great clock maker” and “he who lights the stars one by one each evening.”
Southwest Tower (11)
Skeletons of man and goblin lie scattered about the soot-covered floor. It is dark. A door at the top of the stairs is closed, as is the door at the bottom of the stairs. Some skeletons wear armor. Weapons lie intermingled with the dead. A light mold grows over everything. Soot is everywhere.
The doors are heavily charred inside the tower. The door leading down is blocked with furniture and spikes on the other side. A strength roll at a penalty of 5 will open the door.
The secret door doesn’t open from inside the tower, only from the secret corridor. The battlement doors are both open.
If they search, they will see a hint of silver beneath some soot. One sword hilt is weaved in simple jade knotwork. Only a jagged piece of blade remains sticking out of the hilt. It has odd writing on it. This is Lirel len-Elessan. If they take the broken sword, this will “activate” the goblin skeletons surrounding the castle. See the “Magic Items” section for more information about when and how this happens.
Southeast Tower (12)
The trap door is busted open. Pieces of wood fall down the stairs as you brush past the opening. A few skeletons lie jumbled on the floor, animal corpses scattered among them. A grayish curtain of gauze hangs through the trap door up the stairs to the right, and a sliver of light shines through a window on the far wall.
All but a few corpses are desiccated. They are all small animals such as rats, squirrels, and birds. Some are so old they fall to dust on touching them. The gauze is a large spider’s web. It is thicker than the cobwebs they’ve seen everywhere else.
Southwest Tower Third Level (13)
Soot and ash cover everything. Scrolls, papers, and flasks scatter about shelves on the walls. A skeleton lies on the floor, cloth wrapped around its skull. Another is on the floor before the front window. Light from three windows illuminates this tower room.
There were three soldiers here. One jumped to his death (he’s still there at the bottom of the tower), while the other two hoped to wait out the fire below, but it lasted too long. One died of smoke inhalation (the one on the floor) and the other took an arrow because he was hanging his head out the window for air.
There are also four arrow slits in the walls.
The paper easily tears. They’ve been subject to weather, sun, weather, sun, over and over, for a hundred years. Agility rolls are required to hold a paper intact. Most of these are written in Ancient. It will be nearly impossible to carry these papers back home without destroying them. One of the papers describes the means to create the gas in the Pisces room in the dungeon.
If material components are needed, there is a 25% chance that simple components will be here. There is a flask of quicksilver, for example, worth 50 shillings, a vial of sulfur, and a box of huge spider web powder (marked with the symbol for Cancer).
Southeast Tower Third Level (14)
You push aside the spider’s web and can see clearly into the upper tower. Light is shining through gossamer strands around each window. The netting on the far window shakes as a tiny sparrow struggles within it. The strands hang throughout the room and cover the ceiling like a blanket of criss-crossing string. There may be a bronze glint behind the webbing on the left wall.
 There are two large spiders in the webbing on the ceiling. They are extremely likely to attack about a round or two after anyone enters and begins moving the strands of webbing.
Large spiders (Animal: 1; Survival: 3, 4; Move: 10; Attack: 1 point; Lair: 90%; Poison: strength 1, one round action time, d2 injuries)
Most of the papers here are unreadable. Golden bookends surround some books that have survived fairly well behind the webbing. The bookends are of gold leaf, heads studded with blue gems for eyes, green for earrings, and the gold hair pounded into curls. The bookends are worth 250 shillings each and have a bulk of ten each.
The books are journals of experiments, and catalogs of equipment and materials. A few experiments might be intact, but most are stuck together with other pages, blurred, or even eaten from the inside. At the back of one is a note to “request Pisces key from Abiram or Abbot for more cinnamon”. (Someone with spellcraft might note that cinnamon can be used for certain kinds of aromatic illusions.) Another note in different handwriting says “why not get it yourself?” with an arrow pointing to a crude stick figure getting hit by lightning.
Some flasks are broken. Some sulfur spills out of one flask onto the floor.
Related Pages
- Outside
- Downstairs (The First Floor)
- Upstairs (The Second Floor)
- Encounters
- Battlement
- Charred Door
- Landing (1)
- Clock (2)
- East Overlook (3)
- West Overlook (4)
- Bedrooms (5)
- Toy Room (6)
- Carrels (7)
- Abbot Jethroh Parthane’s Bedroom (8)
- Master Astronomer Abiram Forney’s Bedroom (9)
- Temple (10)
- Southwest Tower (11)
- Southeast Tower (12)
- Southwest Tower Third Level (13)
- Southeast Tower Third Level (14)
- Zodiac Dungeon
- Stelopolis